This article explains Widgets and Custom Content Pages in Pulse Commerce, including what each feature is used for, how they differ, and how to configure them in the Admin Panel. It also includes common use cases and decision guidance so you can choose the correct tool for a given storefront content requirement.
Widgets (also called Sockets) refer to specialized storefront content areas that can be enabled/disabled and populated with content. Common examples include “In the Spotlight,” “Money Savers,” “Cool Features,” or similar content blocks depending on your storefront configuration.
Widgets are managed in Content Manager > Widget Manager. The Widget Manager controls widget visibility and content in key storefront regions, such as:
- The Center Panel of the home page.
- The Right Panel (displayed on every product page in the store).
- Top Panel: at the top of the home page.
- Left Panel: left side of the home page.
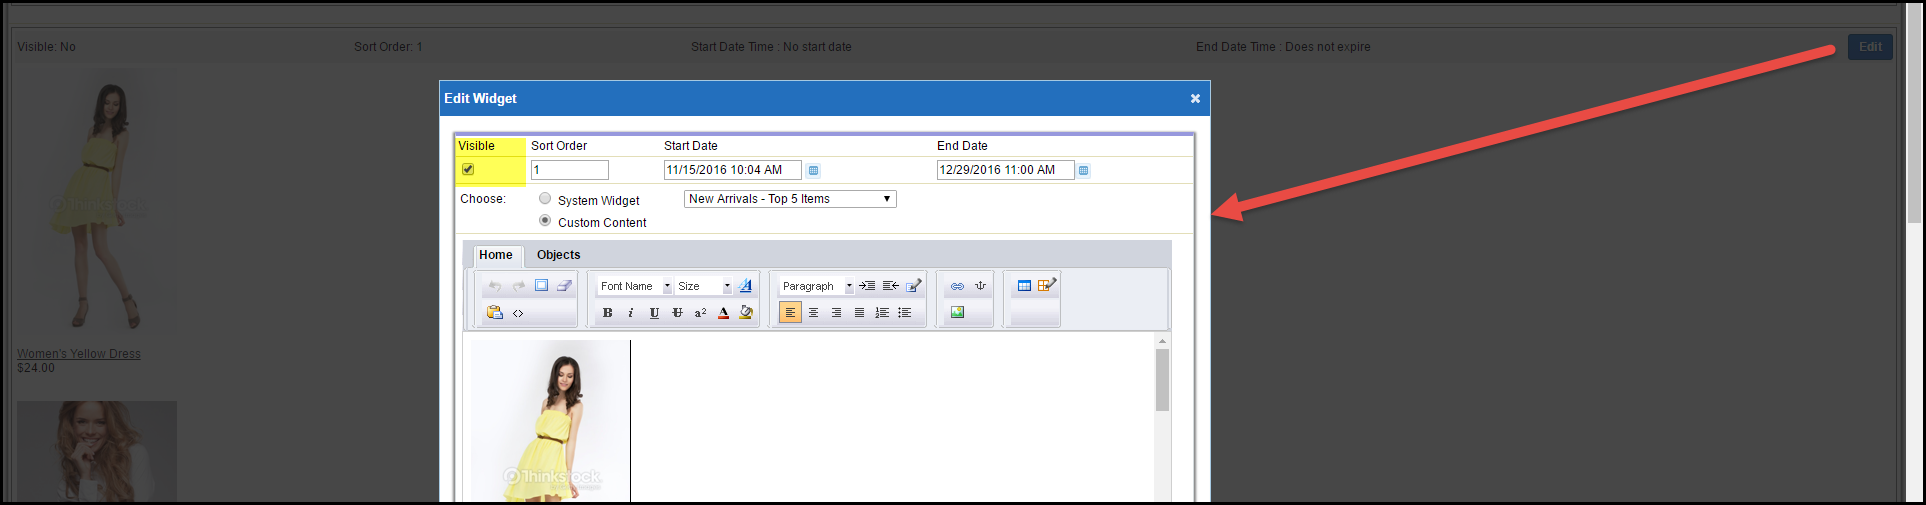
Widgets are made visible by selecting the Visible checkbox for the widget/socket.
- Go to Content Manager > Widget Manager.
- Choose the panel area that corresponds to where you want the widget to display: Right Panel, Center Panel, Top Panel, or Left Panel. (The Right Panel supports various system widgets.)
- Locate the widget and update content as needed.
- Click Edit.
-
Select or clear the Visible checkbox to show or hide the widget.
Pulse Commerce supports two types of Custom Pages you can create for your storefront: Dynamic custom pages and Static custom pages.
- Dynamic custom pages: Use your storefront’s existing template/shell. You can edit page content, page title, keywords, and meta tags. You can also control whether the page automatically appears in a specific links group and whether it is Members Only.
- Static custom pages: Designed by you (using external tools), uploaded to a server location, and linked from other pages in your site.
- Navigate to Content > Custom Pages.
-
Click Add new custom page.
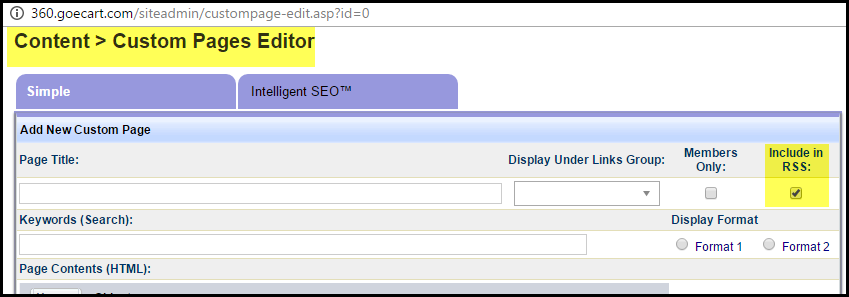
- In the Custom Pages Editor, complete the fields needed for your page (content, title, metadata, links group behavior, and member access controls).
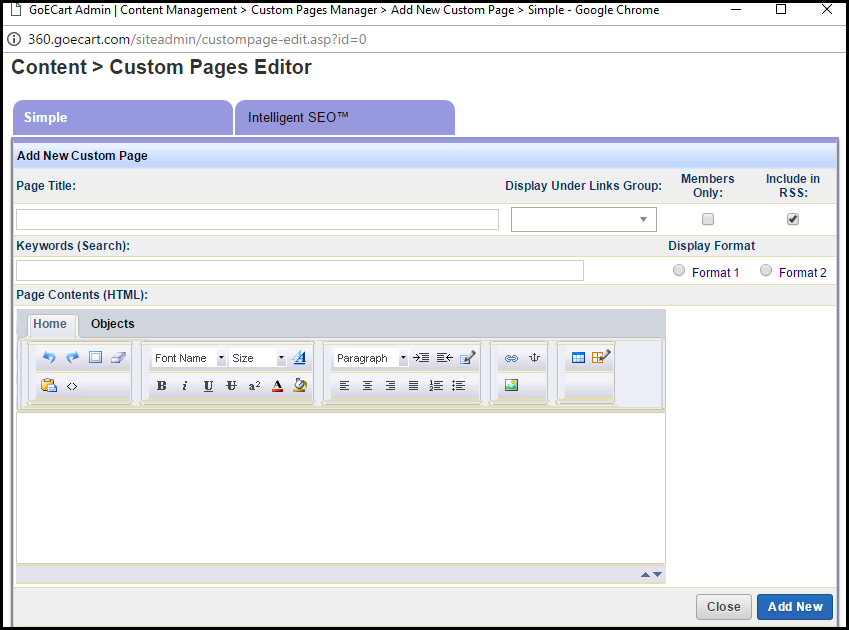
Display Format note: When Display Format 1 is selected, the Custom Page displays without the website shell. When Display Format 2 is selected, the Custom Page dynamically displays the website shell. - Click Add New.
The Custom Page Editor includes a Members Only checkbox that restricts access to logged-in customers. If a customer attempts to access a Members Only custom page without being logged in, they will be redirected to the customer login portal.


| Widgets (Sockets) | Custom Content Pages |
| Embedded content blocks in predefined storefront regions (home page panels, product page right panel). | Standalone storefront pages (dynamic pages with storefront shell or static uploaded pages). |
| Controlled by Visible checkbox and panel location in Widget Manager. | Controlled by page settings in Content > Custom Pages (title, meta, display format, link groups, Members Only). |
| Best for reusable promos, spotlight blocks, product page side content. | Best for policy pages, FAQs, landing pages, brand pages, and content destinations. |