This article covers step by step instructions on enabling the Manufacturer Editor Level feature and assigning a brand to a product.
- Go to Site Settings > Navigation Layout.
- Select Visible for Shop By Manufacturer.
- Add a Label to the feature.
(or) - Add an image path to the Image field. If an image is entered, it will replace the label text.


Shop By Manufacturer will now be enabled for the left navigation menu.
The Manufacturer Editor is used for adding, editing, and deleting the names and details of the companies whose products are listed in the store:
- Go to Products > Manufacturer Editor.
- Click the Add New Manufacturer link.

- Enter the Name of the Manufacturer.
- Select Show Mfg. Label to make the label visible.
- Enter a Short Description to be displayed on Manufacturer display page in the store.
- Enter the text you want to be displayed in your browser's title bar for the category in the Page Title field.
- Enter the HTML tags to describe page content, used to optimize the site for search engines, in the Meta Tags field.
- Click Add New button to add the brand.

- Go to Products > Inventory Manager.
- Click the Edit link beside the product for which you would like to define a brand.
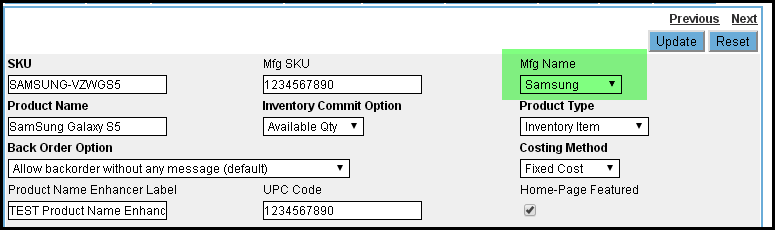
- In the Simple Tab, specify the MFG SKU and MFG Name. Select the brand from the drop down.
- Click Update to save changes.


Store Front:
